Pet Photography: 11 Professional Tips
Pet photography guide: 11 professional tips. Eye level, natural light, burst mode, using toys and editing balance. Tips for phone and camera.
 Wuffi Pet
3 May 2026
4 min read
Wuffi Pet
3 May 2026
4 min read
AI-Powered
AI Summary — No time to read? Get the gist in 30 seconds.
The 11 golden rules of professional pet photography start with going down to eye level, using natural light, simplifying the background and using burst mode. Catching attention with toys, sharp focus on the eyes and slightly higher exposure double the quality. Play and grooming before the shoot are essential. In editing, reflecting the animal's true character without overdoing it is the key goal. By 2026, phone cameras can produce professional-grade results.
You have 847 photos on your phone — all of Caramel. But not a single one you say “let me frame this photo” because none truly captures her character. Pet photography has become a professional field; there are pet accounts with millions of followers on Instagram and TikTok. Here are 11 tips for everyone from amateurs shooting with phones to professionals with Canons.
1Get to eye level — every time.
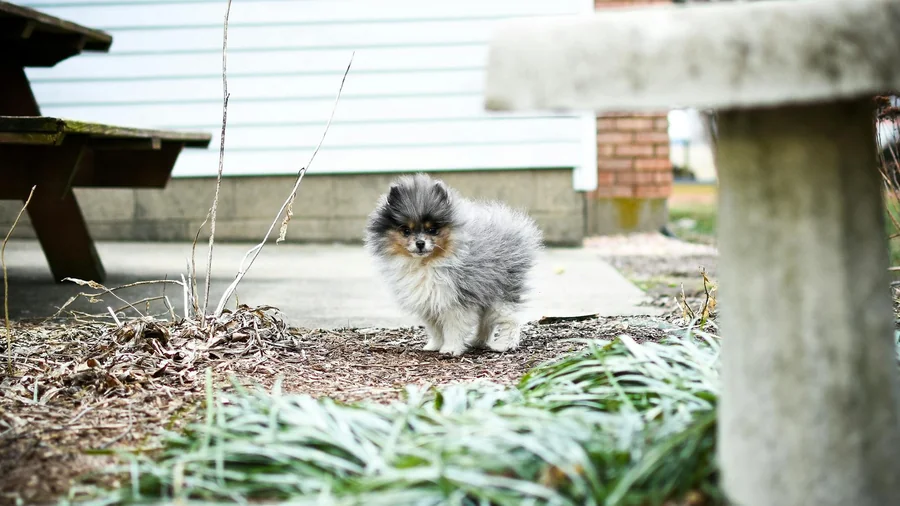
This is the only golden rule of pet photography: lie on the ground, kneel, look into their eyes. A cat photo taken from above makes them small and “underneath”; the same cat shot from eye level looks equal, characterful and sincere. Even National Geographic photographers crawl on the ground for hours during animal shoots. Knee protectors are a necessity.
2Always use natural light.
Don’t use flash — you get red-eyed, panicked-faced, shiny-coated photos. Instead, use window light. “Golden hour” — hours after sunrise and before sunset — make pet fur look golden. Avoid harsh midday light; soft cloudy days are weather conditions that show fur best. If you want to see every strand on Caramel’s coat, choose by the window.
3Simplify the background.
In best pet photos background is plain: solid-color wall, grass, empty couch. Cluttered living room, electric cables, laundry basket ruin the photo. Tidy the environment for 30 seconds before shooting — or move your animal to a clean surface. If shooting in portrait mode, phone blurs background; still a plain background is always better.
4Get attention using toy or sound.
Yelling “Look here Pamuk!” usually doesn’t work — cats pretend not to hear, dogs don’t care because they hear it too often. Use a new sound: key jingle, sound of new toy, “tsk tsk” tongue sound. An assistant can help: camera you, attention task assistant. Holding a toy right above the lens gives perfect pose results.
5Use burst mode.
Cat and dog movements change every hundredth of a second. Instead of single shot, switch to burst mode — hold shutter button on iPhone, “burst” option on Androids. In 30 frames you’ll get at least 2-3 perfect shots. Professional sports photographers use the same technique. Choosing the best later is the most enjoyable part of editing.
6Play before shooting.
Don’t try to photograph an explosively energetic dog, a sluggish cat or a sleepy rabbit. Balance the dog’s energy by playing 10-15 minutes; wave a toy to make the cat active. “Ideal energy level” — neither bursting nor sleeping — produces best poses. To capture this level, you need to know the animal.
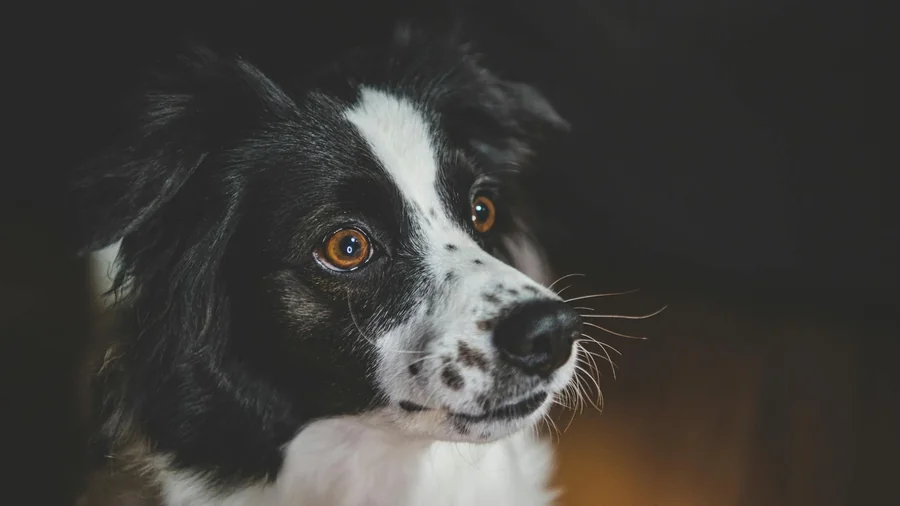
7Focus on eyes.
The most important point in a pet photo: eyes. Nose sharp, ears blurry — no problem; but if eyes are blurry, the photo is born dead. Lock focus by tapping on the animal’s eye on your phone camera screen. If using DSLR, activate “eye-detection autofocus” feature. In 2026, even mid-segment offers this feature.
8Prefer high exposure over low exposure.
If a pet photo is too dark, detail doesn’t come back — fur becomes black mush. Slightly over-lighting the photo and darkening later always gives better results. This is especially critical for white-furred Pamuk; raise exposure (+0.3, +0.7) so details aren’t lost in low light.
9Do grooming before shooting.
The biggest annoyance in pet photo: stuck fur, eye rheum, ear dirt. Camera shows them very clearly. A 5-minute grooming and wiping eye area with damp cotton; doubles the photo’s quality. Professionals don’t start shooting without “grooming” phase. If your cat doesn’t like grooming, a treat-rewarded session before photo is essential.

10Focus on capturing personality, not “perfect pose.”
Secret of professional pet photo: reflecting the animal’s character. Is Buddy a sleeping cat, playful, melancholic, queen? Each one’s photo wants different angle, different light, different pose. Instead of “pose for Instagram,” observe Buddy’s natural state and capture that moment. Best pet photos are those that look “unprepared.”
11Don’t overdo editing.
Light touch with VSCO, Lightroom or Snapseed — exposure, a little contrast, temperature — is enough. Whitening fur, over-brightening eyes, pinking nose makes photo look fake. When you say “this is my cat,” reality should recognize him. Minimal editing approach is trend today; over-filtering is stuck in 2015 style. Preserve reality.
In the end,
Pet photography may seem like a technical job but is actually emotional. Best photos; are taken with patience to capture the most natural state of your animal by the person who knows them best. Phone or camera doesn’t matter — patience, right light, eye level and recognition always win. The next photo you’ll take of Caramel, Pamuk or Leo could be a memory you’ll look at 10 years later. So shoot well.
Frequently Asked Questions
Telefon ile profesyonel pet fotoğrafı çekilebilir mi?
Evet, 2026 itibarıyla iPhone 15 Pro ve üstü, Samsung S24 Ultra gibi flagship telefonlar profesyonel DSLR sonuçlarına çok yaklaştı. Portre modu, eye-detection autofocus, gece modu ve sürekli çekim özellikleriyle kaliteli pet fotoğrafı çekilebiliyor. Önemli olan cihaz değil, doğru ışık, açı ve sabır.
Kedim fotoğraf çektirmeyi neden sevmiyor?
Birçok neden olabilir. Kameranın lens ışığı kediler için rahatsız edici, fotoğrafçının yaklaşık mesafesi ve kamera sesi stres yaratıyor olabilir. Flaş kullanmayın, sessiz mod çekim yapın, mesafeyi koruyun ve kedi rahat hissettiği anlarda çekim yapın. Birkaç seansta alıştırma yapmak çözüm olabilir.
Hangi saat pet fotoğrafı için ideal?
Altın saatler (golden hour) olarak bilinen, gün doğumundan 1 saat sonra ve gün batımından 1 saat önce en ideal. Işık yumuşak, tüyleri altın tonlara çeviriyor. Öğleyin sert güneş fotoğrafların içinden çıkılmaz gölgeler oluşturuyor. Bulutlu havalar da doğal yumuşak ışık için iyi seçim.
Pet fotoğrafçılığı için hangi ekipman şart?
Zorunlu tek ekipman iyi bir telefon kamerasıdır. Opsiyonel olarak DSLR veya mirrorless, 50mm f/1.8 lens, reflektör (20 TL'ye alüminyum folyo), diz koruyucu, oyuncak/çıngırak dikkat çekmek için, ve iyi bir editing uygulaması (Lightroom Mobile veya Snapseed) yeterli. Ekipmandan çok sabır önemli.
Hangi pozlar pet fotoğrafçılığında en iyi sonuç verir?
Göz seviyesi portre (her zaman), yakın çekim (burun/kulak detayları), uyku halinde sakin portreler, hareket halindeki dinamik kareler (burst modu ile), başka bir hayvan/insanla etkileşim kareleri, ve yaşam tarzı çekimleri (yatakta, pencere kenarında, oyuncakla) en etkili pozlar arasında.